.png?width=500&height=141&name=BRANDING%20ELEMENTS%20LIBRARY%20(11).png)
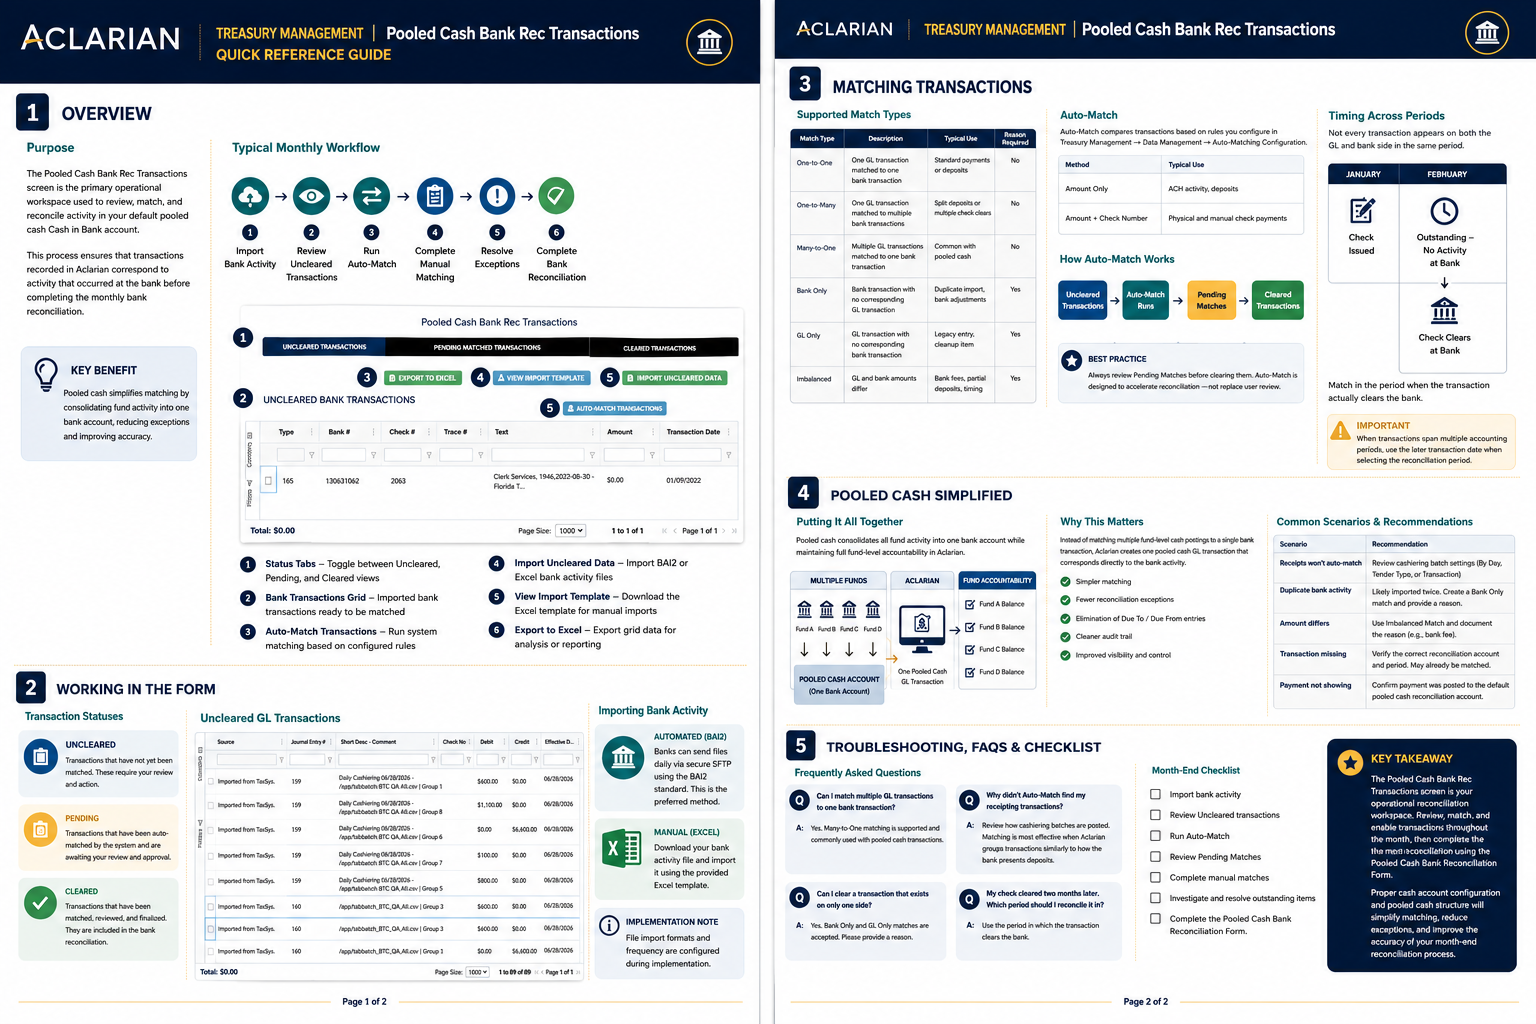
Matching bank transactions to your General Ledger postings is a key part of bank reconciliation. Aclarian offers two ways to do this:
- Auto-matching lets the system find and suggest matches automatically, reducing the manual effort of reconciling transactions one by one.
- Manual matching gives you full control for edge cases, one-off corrections, and complex scenarios the system cannot handle on its own.
This article walks you through both.
Part 1: Setting Up Auto-Match
Navigate to: Treasury Management > Data Management > Auto-Matching Configuration
There are two auto-match types available. Only one can be active at a time. You can switch between them as needed.
Match Type 1: Amount and Check Number
Use this match type for checks and ACH disbursements.
The system looks for a match where both the dollar amount and the check number or ACH trace ID are identical between the bank transaction and the GL transaction.
There is a 180-day lookback window built into the system. This is not adjustable. It limits the transactions pulled into the match pool to reduce false positives.
To enable it, select Amount and Check Number and click Save Changes.
Match Type 2: Amount Only
Use this match type for transactions that do not have a check number or trace ID. For example, journal entries that post directly to cash.
Because there is no unique identifier like a check number, the system matches by dollar amount within a date window that you set.
When you select Amount Only, a Transaction Date Differential dropdown appears with options from 1 to 10. The number you choose is the maximum number of days apart the GL transaction and the bank transaction can be for the system to consider them a match.
Important: The system uses the effective date on the GL transaction, not the posting date.
Example: If you set the date differential to 3 and the bank transaction has an effective date of April 4, the system will look for GL transactions with effective dates between April 1 and April 7 with the same amount. A GL transaction dated April 9 would not match under a 3-day setting.
The system also limits the data pull to the last 90 days. This is a backend setting and is not adjustable. It further reduces false positive matches.
The system processes oldest transactions first in both the bank and GL sides. This helps when multiple transactions share the same dollar amount within the date range.
Set your date differential and click Save Changes.
Part 2: Running Auto-Match
Navigate to: Treasury Management > Data Management > Pooled Cash Bank Rec Transactions
This page shows your main bank account view. It has three tabs:
| Tab | What It Shows |
|---|---|
| Uncleared Transactions | All bank and GL transactions not yet matched or cleared |
| Pending Matched Transactions | System-generated matches waiting for your review |
| Cleared Transactions | Finalized, reconciled transactions |
How to Run Auto-Match
- Go to the Uncleared Transactions tab
- Click the Auto-Match Transactions button
- A prompt will appear asking you to confirm. Click I Am Sure! to proceed.
- The system processes the match in the background. You will receive an email notification when it is complete.
Processing time depends on how many transactions you have. A few hundred transactions may take just moments. Larger volumes may take longer.
If you see the message "Auto match request is already in process," a previous match job is still running. Wait for it to finish before running another.
Reviewing Your Pending Matches
Once the auto-match job is complete, go to the Pending Matched Transactions tab. This is your review stage. No matches are finalized until you take action.
Each pending match shows:
- Match ID
- Bank transaction details including date, type, bank number, effective date, and description
- GL transaction details including journal entry number, source, effective date, and amount
- A View Form link to open the original form that created the payment
You can export the list to Excel using the Export to Excel button if you prefer to review in a spreadsheet.
Approving or Rejecting Matches
Select one or more pending matches using the checkboxes. You can also use Select All. Then choose one of the two buttons at the bottom of the grid:
| Button | What It Does |
|---|---|
| Move to Cleared Transactions | Finalizes the match. It appears in Cleared Transactions with Type = Automatic. |
| Move to Uncleared Transactions | Rejects the match. Both transactions return to Uncleared as if the match never happened. |
You can work in batches. For example, approve 50 matches, then go back and review the remaining ones more carefully.
Part 3: Manual Matching
Manual matching handles transactions that auto-matching cannot resolve. This includes situations where amounts do not align exactly, transactions with no counterpart, or complex scenarios like P-Card lump sum payments.
Manual matching is done in the Uncleared Transactions tab of Pooled Cash Bank Rec Transactions.
Choosing the Right Fiscal Year and Month
When you complete a manual match, the fiscal year and month you select determines which month's bank reconciliation the item appears in.
Rule of thumb: always use whichever date is later, the bank transaction's effective date or the GL transaction's effective date.
| Scenario | Month to Select | Why |
|---|---|---|
| Check hit the GL in June, vendor cashed it in August | August | August is the later date. The check appears as outstanding in July and clears in August. |
| Receipt hit the bank end of July, GL entry recorded in August | August | August is the later date. The GL entry did not exist until August. |
| Both bank and GL transaction in the same month | That month | Select the current month. |
| Matching was missed for several months | The month both sides cleared | Use the later effective date even when matching retroactively. Be aware that matching in a period with a completed bank rec form could affect that form. |
Think of it this way: select the month when the item is no longer a reconciling item.
Match Type 1: Standard 1:1 Bank and GL Match
This is the most common type. You are pairing one bank transaction with one GL transaction.
- In the Uncleared Transactions tab, find the bank transaction you want to match
- Select it by clicking its checkbox
- In the Uncleared GL Transactions grid, find and select the corresponding GL transaction
- Click Create Match
- The system checks that the amounts match. If they do, select the Fiscal Year and Month and save.
- If the amounts do not match, the system will ask you to enter a reason. Enter the reason and click Save.
- Both transactions move to Cleared Transactions with Type = Manual.
Match Type 2: Many GL to One Bank Transaction
Use this when one bank transaction represents the total of multiple GL transactions. The most common example is P-Card payments.
- Select the single bank transaction in the Uncleared Bank Transactions grid
- In the Uncleared GL Transactions grid, select all the GL transactions that make up the total
- Click Create Match
- Select the Fiscal Year and Month, enter a reason when prompted, and click Save
- All selected transactions move to Cleared Transactions under one Match ID
Match Type 3: Bank Only Match
Use this when you need to clear a bank transaction that does not have or should not have a corresponding GL entry.
Common situations:
- Duplicate bank imports: the same bank file was uploaded twice
- Bank fees or transactions already handled through a different process
- Transactions voided after the bank file was imported
To perform a Bank Only match: select one or more bank transactions without selecting any GL transactions. Click Create Match, select the Fiscal Year and Month, enter a reason, and click Save.
Always write a clear reason such as "duplicate import" so the match is easy to understand during audit review.
A Bank Only match does not affect your Bank Reconciliation balance. It simply removes the transaction from the uncleared list.
Match Type 4: GL Only Match
Use this when you need to clear a GL transaction that does not have a corresponding bank transaction. This is the mirror of a Bank Only match.
Common situations:
- Duplicate GL postings entered in error
- Reversals where the original and reversal net to zero with no bank counterpart
- Voided payments where the bank side was already cleared with a Bank Only match
To perform a GL Only match: select one or more GL transactions without selecting any bank transactions. Click Create Match, select the Fiscal Year and Month, enter a reason, and click Save.
Removing a Match
To undo a manual match, go to the Cleared Transactions tab, find the match, and click the red X button labeled Remove Match. Both transactions return to Uncleared.
Manual Match Type Reference
| Match Type | What You Select | When to Use |
|---|---|---|
| 1:1 Bank and GL | 1 bank transaction and 1 GL transaction | Standard reconciliation where one bank entry matches one GL posting |
| Many GL to 1 Bank | 1 bank transaction and multiple GL transactions | Lump sum entries like P-Card payments where multiple GL forms make up the total |
| Bank Only | 1 or more bank transactions with no GL selected | Duplicate bank imports, bank fees with no GL impact, or transactions to clear without a GL counterpart |
| GL Only | 1 or more GL transactions with no bank selected | Duplicate GL postings, reversals with no bank counterpart, or clearing voided payment GL entries after the bank side was already cleared |
Part 4: Updating Your Configuration
You can update your auto-match configuration at any time.
Navigate to: Treasury Management > Data Management > Auto-Matching Configuration
Common changes include switching between match types or adjusting the Transaction Date Differential for Amount Only. Make your changes and click Save Changes. The updated configuration takes effect immediately for the next auto-match job you run.
End-to-End Process Summary
| Step | Action | Where |
|---|---|---|
| 1 | Select your auto-match type and set the date differential if using Amount Only | Auto-Matching Configuration |
| 2 | Navigate to Pooled Cash Bank Rec Transactions | Pooled Cash Bank Rec Transactions |
| 3 | Click Auto-Match Transactions and confirm | Uncleared Transactions tab |
| 4 | Wait for the email notification | |
| 5 | Review auto-matches and export to Excel if needed | Pending Matched Transactions tab |
| 6 | Move matches to Cleared or back to Uncleared | Pending Matched Transactions tab |
| 7 | Perform manual matches for remaining unmatched transactions | Uncleared Transactions tab |
| 8 | To undo a manual match, remove it from Cleared Transactions | Cleared Transactions tab |
Key Reminders
- Only one auto-match type can be active at a time. Switch between them as needed.
- Amount Only uses the effective date on the GL transaction, not the posting date.
- Amount Only is limited to the last 90 days. Amount and Check Number uses a 180-day lookback window. Neither is adjustable by the user.
- Auto-matches go to Pending Matched Transactions first. No match is final until you approve it.
- Always use the later of the two effective dates when selecting the Fiscal Year and Month for manual matches.
- Always enter a clear reason on manual matches for audit clarity.
- Matches can be removed from Cleared Transactions at any time. Both sides return to Uncleared.
Need Help
If you have questions about auto-matching or manual matching for bank reconciliation, contact the Aclarian Client Support team for assistance.
- Email: clientsupport@aclarian.com
- Contact your assigned Customer Support liaison
- For urgent issues, use the Live Chat Feature